Rendering/lighting: 1 hour
Polycount: 932 Tris
Today I handed in the start of a four week modeling project, creating a cannon mesh in Maya. I spent an hour watching Nick's Maya modeling videos to get a sense of how to best development this piece in a timely. Then I imported Nick's prop concept images and set the mesh's scale to the rough dimensions discussed in Nicks modeling tutorial videos, and an appropriate height to UE4's Third Person character mesh. I found myself needing to retopologize the mesh while I was modeling new parts in order to control the polycount and form of the piece. I decided to bore out the cannon's tube to improve the cannon's prototypical design. Before exporting the mesh as an fbx file, I quickly set up an automatic UV map of the now combined cannon's pieces.
Once modeled, I pushed it over to UE4's third person level, save as a copy level the level, and set up my cannon with a couple copies set around the third person figure. Finally, I added colorful materials to the cannons to test out the look of the mesh when applied with different materials instances.
Next week, we plan to properly UV the mesh and create a high poly sculpt from the lower poly cannon model.


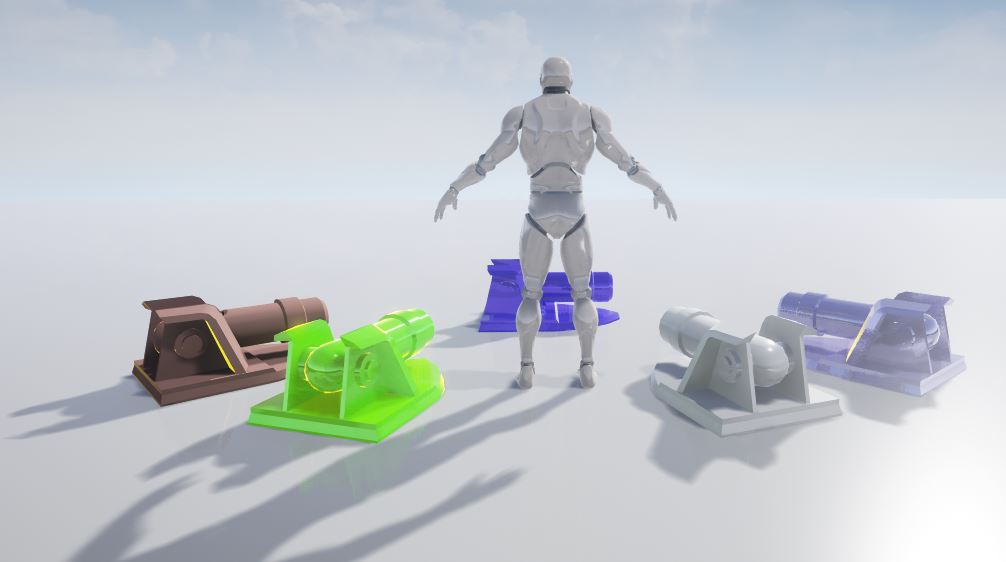
Nice work on the model. The only thing that is odd is the split on the top of the cannon between the hole on the top and the front of the cannon. The back top of the protective flaps has an odd shape to it and it could have a little more geometry for rounding where it goes from a straight vertical to a straight horizontal.
ReplyDelete